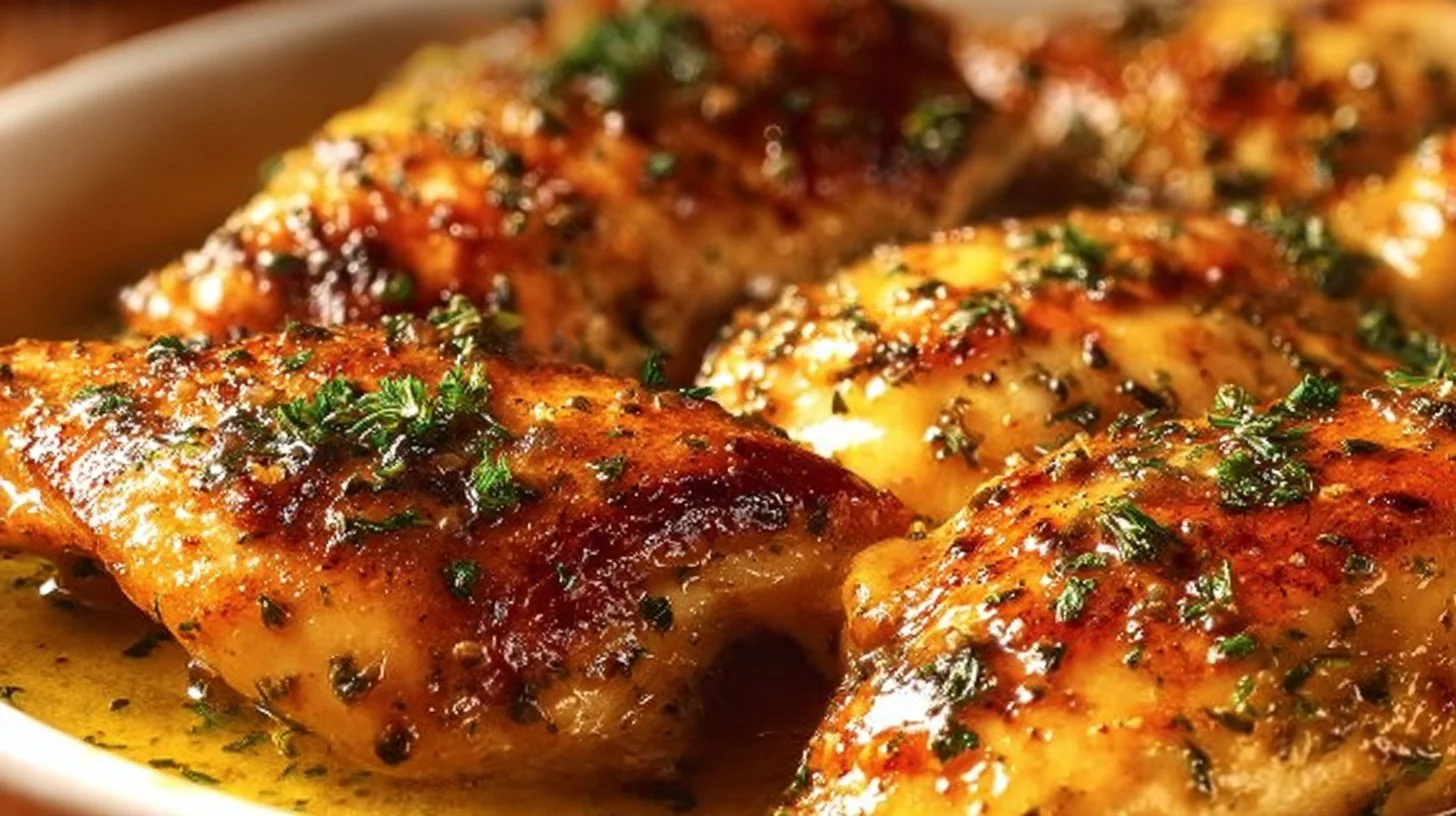
I’ll be honest—for years, I avoided baking chicken breasts. Too many disappointing dinners spent furiously squirting ketchup over dry, rubbery chicken in a desperate attempt to make it palatable. But then I discovered this method, and everything changed. This Oven Baked Chicken Breast recipe has become the single most popular chicken recipe I’ve ever shared, and for good reason. A simple, magic seasoning featuring an unexpected ingredient—brown sugar—transforms ordinary chicken breasts into something beautifully caramelized on the outside and incredibly juicy inside. No more dry chicken. No more overcomplicating dinner. Just perfectly cooked, flavorful chicken that’s ready in about 20 minutes.
The secret lies in cooking the chicken hard and fast at high temperature, which creates gorgeous caramelization while keeping the interior tender and moist. Combined with a seasoning blend that makes the chicken “sweat” as it bakes (creating natural juices), you’ll finally achieve that elusive juicy baked chicken breast you’ve been chasing. This is the kind of foundational recipe you’ll return to week after week, adapting it endlessly while always getting reliable, delicious results.
Why You’ll Love This Recipe
Foolproof juiciness: The brown sugar in the seasoning isn’t just for sweetness—it causes the chicken to release moisture as it bakes, creating a semi-sauce that keeps everything incredibly juicy. No more dried-out disappointment.
Fast and simple: Ready in just 23 minutes total with only 5 minutes of hands-on prep. This is weeknight cooking at its finest—minimal effort, maximum payoff.
Beautiful caramelization: Baking at high heat (425°F/220°C) creates a gorgeous golden-brown crust that’s visually appealing and packed with flavor. The chicken looks like something from a restaurant.
Versatile base recipe: Use these perfectly seasoned chicken breasts in sandwiches, salads, meal prep bowls, or as the centerpiece of any dinner. It’s the Swiss Army knife of chicken recipes.
Budget-friendly: Chicken breasts are affordable and widely available. This recipe makes them taste far more expensive than they are.
Kid and family approved: The seasoning is savory with just a hint of sweetness—not overpowering or spicy, making it appealing to even picky eaters. Thousands of families have made this their go-to chicken recipe.
“We haven’t eaten chicken breast for years. They often turned out dry, tough, boring. This chicken breast is the best! It was super easy to prepare, quick to cook and was moist, flavorful and delicious.” — Susan, home cook
“I’ve always struggled with making good tender not tough or dry chicken breasts. I’ve tried many recipes and I must say that I have found the perfect recipe! My family was so happy with how this chicken came out! This will be my GO TO chicken recipe.” — Victoria W.
How This Recipe Comes Together
The brilliance of this method lies in its simplicity and strategic technique. You’ll start by pounding chicken breasts to an even thickness of about 0.6 inches—this ensures uniform cooking so you don’t end up with dry edges while waiting for thick centers to finish.
Next comes the magic seasoning blend: brown sugar, paprika, dried oregano (or thyme), garlic powder, salt, and pepper. The brown sugar is the secret weapon here. It does double duty by creating more volume for thorough coverage without overwhelming the chicken with spices, and it draws out moisture from the chicken as it bakes, essentially creating a light glaze that keeps everything juicy.
You’ll coat both sides of the chicken with a light drizzle of oil (which helps the seasoning stick and promotes browning) and a generous sprinkle of that seasoning mixture. The chicken goes into a very hot oven—425°F/220°C—where it bakes quickly. This high-heat method is crucial: it caramelizes the sugars and spices on the surface while the interior cooks through rapidly, giving you no opportunity for the meat to dry out.
The visual cue for doneness is your best friend here. Once the surface is beautifully golden and caramelized (about 18 minutes for medium breasts), the interior has reached perfect doneness. You can verify with a meat thermometer (165°F/75°C), but that caramelized crust is nature’s timer.
After a brief rest to allow juices to redistribute, you’re rewarded with chicken that’s golden, aromatic, perfectly seasoned, and genuinely juicy—the holy grail of baked chicken breasts.
What You’ll Need
For the chicken:
- 4 chicken breasts, 5-6 oz (150-180g) each
- 2 teaspoons olive oil
For the magic seasoning:
- 1½ tablespoons brown sugar (the secret ingredient!)
- 1 teaspoon paprika (adds color and mild sweetness)
- 1 teaspoon dried oregano or thyme (or other herb of choice)
- ¼ teaspoon garlic powder
- ½ teaspoon salt
- ½ teaspoon black pepper
Optional garnish:
- Finely chopped fresh parsley
Ingredient notes: If your chicken breasts are extra large (8+ oz each), cut them in half horizontally to create thinner cutlets rather than pounding them. This recipe also works beautifully with boneless, skinless chicken thighs—cook small/medium thighs for 25 minutes and larger ones for 30 minutes. The brown sugar is what makes this special, but you can experiment with coconut sugar for a slightly different flavor profile.
Step-by-Step Instructions
Step 1: Preheat and prep
Preheat your oven to 425°F/220°C (or 200°C fan-forced). Line a baking tray with aluminum foil and top with parchment or baking paper for easy cleanup.
Step 2: Pound the chicken
Using a rolling pin, meat mallet, or even your fist (surprisingly therapeutic!), pound each chicken breast until it’s about 0.6 inches (1.5 cm) thick at the thickest part. This ensures even cooking and tenderizes the meat simultaneously. If your breasts are very large, consider cutting them in half horizontally instead.
Step 3: Mix the seasoning
In a small bowl, combine brown sugar, paprika, dried oregano (or thyme), garlic powder, salt, and pepper. Stir until evenly mixed.
Step 4: Season the first side
Place chicken breasts upside down on your prepared baking tray. Drizzle with about 1 teaspoon total of olive oil. Rub the oil over the surface with your fingers to distribute evenly. Sprinkle generously with the seasoning mixture, trying to cover as much surface area as possible.
Step 5: Season the second side
Flip the chicken breasts over. Drizzle with the remaining teaspoon of oil, rub it in with your fingers, then sprinkle with the remaining seasoning. Again, aim for thorough coverage—don’t be shy with the seasoning.
Step 6: Bake to golden perfection
Place the tray in the preheated oven and bake for 18 minutes, or until the surface is beautifully golden and caramelized as shown in photos/video. The caramelization is your visual indicator of doneness. If you want to be certain, check that the internal temperature reaches 165°F/75°C with a meat thermometer inserted into the thickest part.
Step 7: Rest before serving
As soon as the chicken is done, immediately transfer the breasts from the baking tray to serving plates—don’t let them sit on the hot tray or they’ll continue cooking. Let them rest for 3-5 minutes before cutting or serving. This allows the juices to redistribute throughout the meat, ensuring every bite is moist and tender.
Step 8: Garnish and enjoy
Sprinkle with freshly chopped parsley if desired and serve hot. The chicken is perfect on its own or sliced for use in countless other dishes.
Best Ways to Enjoy It
As the main event: Serve whole or sliced alongside your favorite sides—roasted vegetables, mashed potatoes, rice pilaf, or a fresh salad. The simplicity of the chicken makes it pair beautifully with virtually anything.
With flavored rice sides: Garlic butter rice with kale (pictured in the original recipe), tomato basil rice, or mushroom rice all complement the savory-sweet chicken perfectly.
Potato pairings: Try lemon potato salad for brightness, classic creamy potato salad for comfort, or a lighter no-mayo red potato salad with charred corn and bacon for something different.
Fresh salad combinations: Spring salad or creamy cucumber salad with lemon yogurt dressing provide refreshing contrast. Simple steamed greens or garden salad drizzled with Italian dressing, balsamic vinaigrette, or French vinaigrette work beautifully too.
In sandwiches: Slice this chicken for incredible sandwiches on brioche buns with Colby or pepper jack cheese. The caramelized exterior adds amazing flavor to any sandwich.
Meal prep bowls: Slice and portion with rice, quinoa, or cauliflower rice plus roasted vegetables for easy grab-and-go lunches throughout the week.
Sliced in salads: Let the chicken cool slightly, slice thinly, and arrange over Caesar salad, Greek salad, or any mixed green salad for an instant protein boost.
For tacos or wraps: Dice the chicken and use in tacos, burritos, or wraps with your favorite toppings and sauces.
Storage and Reheating Tips
Refrigerator storage: Allow chicken to cool completely, then transfer to an airtight container. Store in the refrigerator for up to 4 days. The chicken stays remarkably moist even as leftovers.
Freezer storage: This chicken freezes beautifully for up to 3 months. Wrap individual breasts tightly in plastic wrap, then place in a freezer-safe bag with air removed. Label with the date for easy tracking.
Reheating from refrigerated: For best results, reheat gently in a 350°F (175°C) oven for 10-15 minutes until warmed through. Cover loosely with foil to prevent drying. Microwave reheating works for quick lunches—use 50% power and heat in 30-second intervals to avoid tough, rubbery texture.
Reheating from frozen: Thaw overnight in the refrigerator first, then reheat using the oven method above. Don’t try to reheat from frozen or the exterior will overcook before the center warms through.
Food safety reminder: Always reheat chicken to an internal temperature of 165°F (75°C) to ensure it’s safe to eat. Never leave cooked chicken at room temperature for more than 2 hours.
Using leftovers creatively: Cold or room-temperature sliced chicken is perfect for salads, sandwiches, and wraps. The flavorful seasoning works well in virtually any application.
Pro Tips for Success
Pound to even thickness: This is the single most important step for juicy, evenly cooked chicken. Uneven breasts mean overcooked thin sections or undercooked thick sections—neither is ideal.
Don’t skip the high heat: Baking at 425°F (220°C) is crucial for that caramelized crust and juicy interior. Lower temperatures require longer cooking times, which dry out the chicken.
Use the visual cue: The caramelized, golden-brown surface tells you when the chicken is perfectly done. Trust your eyes along with (or instead of) a timer—ovens vary, but caramelization doesn’t lie.
Transfer immediately after baking: Move the chicken from the hot baking tray to plates right away. Leaving it on the tray means it continues cooking from residual heat, potentially drying it out.
Let it rest: Those 3-5 minutes of resting time allow juices to redistribute. Cut immediately and those juices run out onto the plate instead of staying in the meat.
Adjust for fan-forced ovens: If using a fan-forced/convection oven, reduce temperature to 200°C (about 390°F) to account for more efficient heat circulation.
Check thickness: Make sure your chicken is no thicker than 0.6 inches (1.5 cm) at the thickest point. If it is, pound it thinner or it won’t cook through in the recommended time.
Double-check doneness: While the caramelization is a great indicator, using an instant-read thermometer (165°F/75°C in the thickest part) removes all guesswork, especially when you’re first learning this recipe.
Creative Twists and Variations
Spice it up: Add a pinch of cayenne pepper or red pepper flakes to the seasoning blend for gentle heat that doesn’t overpower the other flavors.
Different herb profiles: Swap oregano for Italian seasoning, herbes de Provence, or even a Greek blend. Each brings different personality while the brown sugar magic remains.
Lemon pepper version: Add lemon zest and extra black pepper to the seasoning for bright, citrusy notes that pair beautifully with the caramelization.
Smoky twist: Use smoked paprika instead of regular paprika for deeper, smokier flavor that adds complexity without extra ingredients.
Honey instead of brown sugar: While brown sugar is traditional, honey works well too—just be aware it caramelizes slightly differently and can burn faster, so watch carefully.
Coconut sugar alternative: Some cooks prefer coconut sugar, finding it easier to sprinkle and offering a slightly different sweetness profile.
Asian-inspired: Replace oregano with five-spice powder and add sesame seeds for an Asian twist. Serve with stir-fried vegetables and rice.
Mexican flavors: Use cumin instead of oregano and add chili powder to the blend. Perfect for tacos, burrito bowls, or fajitas.
For chicken thighs: This seasoning works beautifully on boneless, skinless chicken thighs—just increase cooking time to 25-30 minutes depending on size.
Your Questions Answered
Why does my chicken always come out dry?
Dry chicken usually results from overcooking or uneven thickness. Make sure to pound your chicken to even 0.6-inch thickness, bake at the full 425°F, and remove it as soon as the surface is caramelized (about 18 minutes). Using a meat thermometer to verify 165°F helps prevent both under and overcooking.
Can I use this method for chicken thighs?
Absolutely! Boneless, skinless chicken thighs work wonderfully with this seasoning and method. Increase the cooking time to 25 minutes for small/medium thighs and 30 minutes for larger ones. Thighs are more forgiving than breasts and stay juicy even if slightly overcooked.
What if I don’t have brown sugar?
While brown sugar is the “magic” ingredient that makes this recipe special, you can substitute coconut sugar, regular white sugar, or even honey in a pinch. The texture and caramelization will differ slightly, but you’ll still get good results.
How do I know when the chicken is done without a thermometer?
The best visual indicator is the caramelized golden-brown surface—once you see that gorgeous color (as shown in photos), the chicken is done. You can also cut into the thickest part to check: the meat should be white throughout with clear (not pink) juices.
Can I make this in an air fryer?
Yes! Many readers have successfully adapted this for air fryers. Cook at 200°C (390°F) for about 10 minutes, checking for doneness. Air fryers vary significantly, so start checking at 8 minutes to avoid overcooking.
Why is my chicken tough instead of tender?
Tough chicken usually means it was overcooked. Chicken breasts have very little fat, so they toughen quickly when cooked past 165°F. Use a meat thermometer and remove promptly when it reaches temperature. Also make sure you’re pounding the chicken—this tenderizes the meat fibers.
Can I double or triple this recipe?
Absolutely! This recipe scales beautifully for meal prep or feeding a crowd. Just make sure not to overcrowd your baking tray—leave space between breasts for even heat circulation and proper browning.
Do I need to marinate the chicken first?
No! That’s part of what makes this recipe so fast and convenient. The seasoning and high-heat cooking method provide plenty of flavor without any marinating time required.
Can I prep this ahead of time?
You can pound the chicken and mix the seasoning ahead, but I recommend applying the seasoning and baking right before serving for best texture. The caramelized crust is best fresh from the oven.
This Oven Baked Chicken Breast recipe solves the age-old problem of dry, boring baked chicken with a simple, clever approach that actually works. The magic seasoning with its unexpected brown sugar, the high-heat cooking method, and the simple technique of pounding to even thickness combine to create reliable, juicy results every single time. Whether you’re a beginner cook looking for a foolproof chicken recipe or an experienced home chef seeking the perfect weeknight protein, this is the recipe you’ll return to again and again. Make it once, and you’ll understand why thousands of home cooks have made this their go-to chicken recipe—it simply delivers what it promises: perfectly juicy, beautifully caramelized, absolutely delicious baked chicken breast.
Print
Oven Baked Chicken Breast
- Total Time: 23 minutes
- Yield: 4 servings
- Diet: Paleo
Description
A simple, foolproof Oven Baked Chicken Breast recipe that yields juicy and flavorful chicken quickly and easily.
Ingredients
- 4 chicken breasts, 5-6 oz (150-180g) each
- 2 teaspoons olive oil
- 1½ tablespoons brown sugar
- 1 teaspoon paprika
- 1 teaspoon dried oregano or thyme
- ¼ teaspoon garlic powder
- ½ teaspoon salt
- ½ teaspoon black pepper
- Optional garnish: Finely chopped fresh parsley
Instructions
- Preheat your oven to 425°F (220°C). Line a baking tray with aluminum foil and top with parchment paper.
- Pound each chicken breast to an even thickness of about 0.6 inches.
- In a small bowl, mix together brown sugar, paprika, oregano (or thyme), garlic powder, salt, and pepper.
- Place chicken breasts upside down on the baking tray. Drizzle with 1 teaspoon of olive oil and rub to distribute. Sprinkle with the seasoning mixture.
- Flip the chicken breasts, drizzle with the remaining olive oil, rub it in, and season the other side.
- Bake in the oven for 18 minutes, or until the surface is golden and caramelized.
- Transfer chicken to serving plates and let them rest for 3-5 minutes before cutting or serving.
- Garnish with parsley if desired and enjoy.
Notes
This recipe works beautifully with boneless, skinless chicken thighs—cook smaller thighs for 25 minutes and larger ones for 30 minutes.
- Prep Time: 5 minutes
- Cook Time: 18 minutes
- Category: Main Course
- Method: Baking
- Cuisine: American