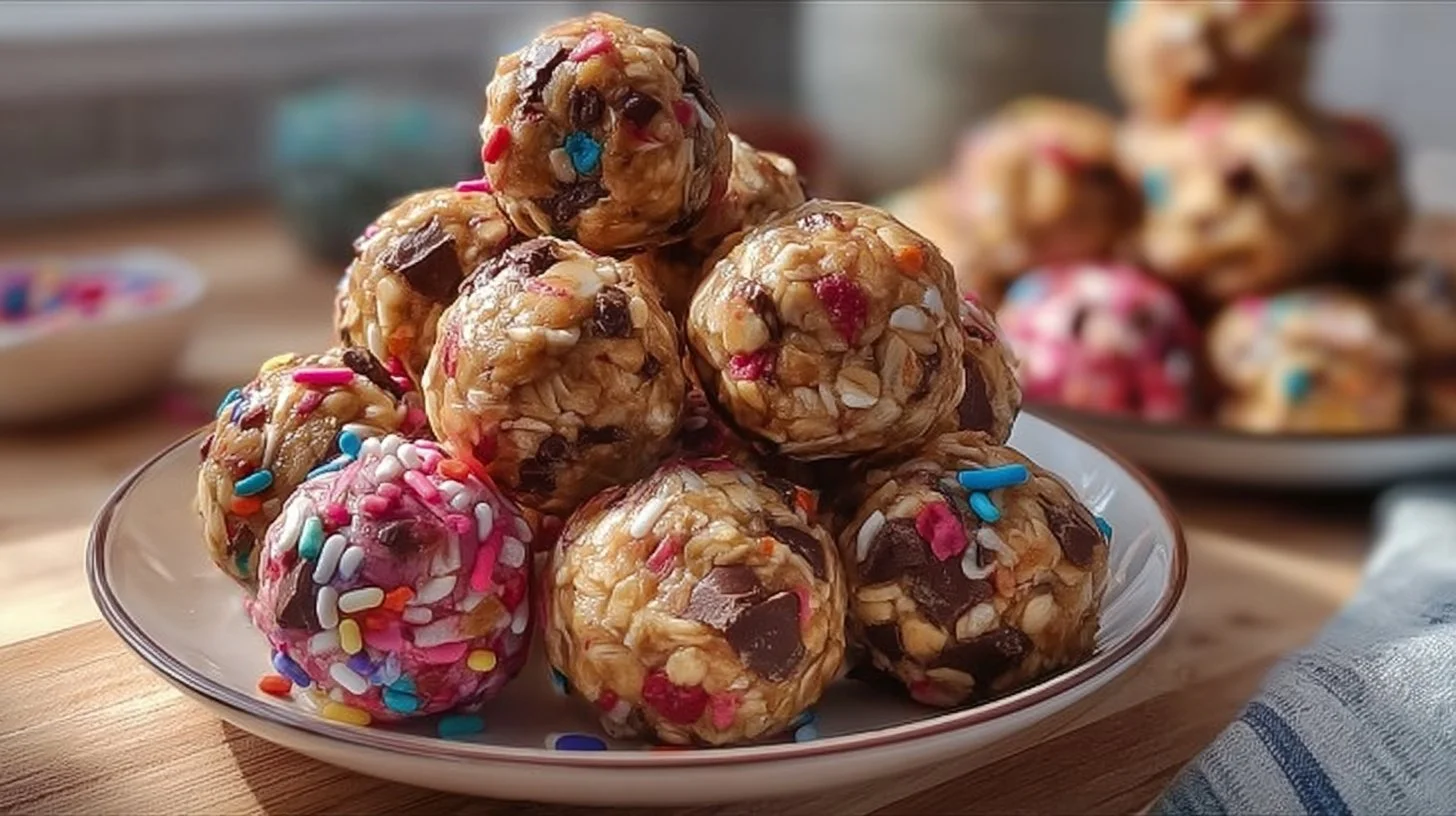
I still remember the first time I rolled a batch of these energy bites on a hectic Sunday afternoon. I needed something wholesome for my kids’ lunchboxes that wouldn’t require turning on the oven, and these little powerhouses became an instant staple. Now, years and countless batches later, they’re the recipe I reach for whenever I need a quick snack that delivers both nutrition and satisfaction. There’s something wonderfully therapeutic about rolling these bite-sized treats while knowing they’ll fuel busy mornings and afternoon slumps all week long.
Why you’ll love this recipe
These no-bake energy bites check every box for the perfect make-ahead snack. They come together in under 20 minutes with simple pantry staples—no special equipment or culinary skills required. The combination of oats, peanut butter, and honey creates a naturally sweet treat that satisfies cravings without the sugar crash, while ground flaxseed and chia seeds pack in protein, fiber, and omega-3s.
They’re incredibly versatile for different dietary needs. Swap the honey for maple syrup to make them vegan, use certified gluten-free oats for a gluten-free option, or substitute sunflower seed butter for a nut-free version. These bites are perfect for busy weekday breakfasts, post-workout refueling, afternoon pick-me-ups, road trip snacks, or tucking into lunchboxes. Best of all, they store beautifully in the fridge for a week or the freezer for three months.
“I’ve been making these for years now! I always make them for a new mom when I bring a meal after having a baby. And my little boys love them! They’re the perfect little snack!” — Mariah, home cook
How to make No-Bake Energy Bites
This recipe couldn’t be simpler. You’ll combine all your ingredients in one bowl—old-fashioned oats, toasted coconut, creamy peanut butter, ground flaxseed, chocolate chips, honey, vanilla, and optional chia seeds. After a thorough stir to ensure everything is evenly distributed, the mixture needs a short chill in the refrigerator to firm up and make rolling easier. Once chilled, you’ll shape the mixture into one-inch balls, and they’re ready to enjoy. The entire active prep takes about 20 minutes, with most of the “work” happening hands-off in the fridge.
What you’ll need
For the base:
- 1 cup old-fashioned oats (also called rolled oats—the hearty foundation)
- 2/3 cup toasted shredded coconut, sweetened or unsweetened (toast it first for deeper flavor, then let it cool completely)
- 1/2 cup creamy peanut butter (traditional or natural both work beautifully)
- 1/2 cup ground flaxseed (adds protein, fiber, and those important omega-3s)
For sweetness and binding:
- 1/3 cup honey (or maple syrup for vegan option)
- 1/2 cup semisweet chocolate chips (mini chips mix in more easily than standard size)
For extra flavor:
- 1 tablespoon chia seeds, optional (skip if you don’t have them on hand)
- 1 teaspoon vanilla extract (pure vanilla gives the best flavor)
Step-by-step instructions
- Toast the coconut. Spread shredded coconut on a baking sheet and toast in a 350°F oven for 5-7 minutes, stirring once, until lightly golden. Alternatively, toast it in a dry skillet over medium heat, stirring frequently. Let it cool completely before proceeding—warm coconut will melt the chocolate chips.
- Combine everything. Add the oats, cooled toasted coconut, peanut butter, ground flaxseed, chocolate chips, honey, vanilla extract, and chia seeds (if using) to a large mixing bowl. Stir vigorously with a sturdy spoon until all ingredients are thoroughly combined and no dry pockets of oats remain. The mixture should look cohesive and slightly sticky.
- Chill the mixture. Cover the bowl tightly with plastic wrap or a lid and refrigerate for 1-2 hours until the mixture is firm and cold. This chilling step is crucial—it allows the ingredients to bind together and makes rolling much easier. For faster results, spread the mixture on a small baking sheet and pop it in the freezer for 20-30 minutes.
- Roll into balls. Using clean hands or a small cookie scoop, portion out about one tablespoon of the mixture at a time. Roll between your palms to form smooth, compact one-inch balls. If the mixture seems too crumbly, add another tablespoon or two of peanut butter to increase stickiness.
- Store and enjoy. Transfer the finished energy bites to an airtight container. They’re ready to eat immediately or can be stored in the refrigerator for up to one week, or frozen for up to three months.
Best ways to enjoy them
These energy bites are incredibly versatile throughout your day. Grab two or three for a quick breakfast alongside your morning coffee, or pack them in lunchboxes as a midday treat that won’t leave you sluggish. They’re perfect for pre-workout fuel about 30 minutes before exercise, or as a post-workout recovery snack paired with a glass of chocolate milk.
Keep a container at your desk for afternoon energy slumps, tuck a few in your bag for road trips or hiking adventures, or serve them on a platter with fresh fruit and nuts for casual entertaining. Kids love finding these in their lunch bags, and they’re an excellent alternative to processed granola bars. For special occasions, arrange them in small paper cups on a dessert table—they look surprisingly elegant for such a simple treat.
Storage and reheating tips
Store energy bites in an airtight container in the refrigerator for up to one week. Layer them between sheets of parchment paper if stacking to prevent sticking. They taste best when slightly chilled, as the texture firms up nicely.
For longer storage, freeze the energy bites for up to three months. Arrange them in a single layer on a parchment-lined baking sheet and freeze until solid (about 1 hour), then transfer to a freezer-safe container or bag. This prevents them from freezing into one giant clump. When you’re ready to enjoy, let them thaw at room temperature for 10-15 minutes, or microwave frozen bites for just 10-15 seconds to take the chill off.
Some readers prefer warming frozen energy bites in the microwave for a few seconds to create a softer, slightly melty texture—especially nice on cold mornings. Always store these treats in sealed containers to prevent them from absorbing refrigerator odors.
Helpful cooking tips
Toast your coconut for maximum flavor. This simple step transforms the coconut from bland to nutty and aromatic. Just remember to let it cool completely before mixing with chocolate chips.
Adjust consistency as needed. If the mixture won’t hold together when rolling, add more peanut butter one tablespoon at a time until it reaches the right stickiness. If it’s too wet or sticky, add a few more tablespoons of oats.
Use a cookie scoop for uniform size. A small cookie scoop (about 1 tablespoon capacity) ensures all your energy bites are the same size, which means consistent nutrition and even texture.
Make energy bars instead. Short on time? Press the entire mixture firmly into a parchment-lined 8×8-inch baking pan, chill until firm, then slice into bars. This eliminates the rolling step entirely.
Double or triple the batch. These freeze beautifully, so consider making a larger batch when you have time. Quadrupling the recipe as one reader does means you’ll always have healthy snacks ready to go.
Add protein powder for extra nutrition. Mix in 1/4 cup of your favorite protein powder along with 2-3 tablespoons of Greek yogurt to compensate for the drier texture. This boosts the protein content significantly.
Creative twists
Almond Joy version: Use almond butter instead of peanut butter and add 1/4 cup chopped almonds. Drizzle the finished bites with melted dark chocolate for an indulgent treat.
Pumpkin spice delight: Add 2 teaspoons of pumpkin pie spice and substitute 1/4 cup of the honey with pumpkin puree. Use pepitas (pumpkin seeds) in place of chocolate chips for a seasonal twist.
Coconut-free option: Simply omit the coconut and add an extra 2/3 cup of oats. Many coconut-averse readers swear by this version.
Double chocolate: Replace 1/4 cup of the oats with unsweetened cocoa powder and use dark chocolate chips for an intensely chocolatey treat.
Tropical twist: Use cashew butter, add 1/4 cup dried pineapple bits, and substitute macadamia nuts for the chocolate chips. The toasted coconut really shines in this version.
Seed cycling support: Add 1 tablespoon each of pumpkin seeds and sunflower seeds along with the flax and chia for hormone-balancing seed cycling energy bites.
Cinnamon roll flavor: Add 1 1/2 teaspoons ground cinnamon and use white chocolate chips. Drizzle with a simple glaze made from powdered sugar and milk.
Nut-free alternative: Replace peanut butter with sunflower seed butter and use enjoy life chocolate chips (which are nut-free) for a school-safe version.
Common questions
How many calories are in each energy bite?
Each energy bite contains approximately 100-120 calories, depending on the exact size you roll them. They provide a balanced mix of healthy fats, protein, and complex carbohydrates that provide sustained energy rather than a quick sugar spike.
Can I reduce the sweetness?
Absolutely. Start by reducing the honey to 1/4 cup and taste the mixture before chilling. You can also omit the chocolate chips entirely and add a handful of unsweetened dried fruit instead. Some readers find the recipe too sweet with sweetened coconut and recommend using unsweetened.
Why won’t my energy bites hold together?
The most common culprit is not chilling the mixture long enough, or using natural peanut butter that’s too oily. Make sure you chill for the full 1-2 hours, and if they’re still crumbly, add more peanut butter or honey one tablespoon at a time until the mixture becomes sticky enough to form cohesive balls.
How do I prevent the chocolate chips from melting when I add them?
Always let the toasted coconut cool completely to room temperature before mixing everything together. If your kitchen is very warm, you can even chill the oat mixture slightly before adding the chocolate chips.
Can I make these without a food processor?
Yes! This recipe requires no special equipment—just a bowl and a spoon. Unlike many energy bite recipes that blend everything in a food processor, this version simply stirs together, making cleanup a breeze.
Are these suitable for toddlers?
Yes, with a few precautions. Make sure to use smooth peanut butter (not chunky), and consider chopping the chocolate chips smaller or using mini chips to reduce choking hazards. Always supervise young children while eating, and check with your pediatrician about introducing honey to children under one year old.
What’s the best way to transport these for travel?
Pack them in a small insulated cooler bag with an ice pack if you’ll be traveling for more than a couple hours, especially in warm weather. They can sit at room temperature for a few hours without issue, but they do soften as they warm up. For airline travel, they pass through security without problems since they’re solid food items.
Print
No-Bake Energy Bites
- Total Time: 120 minutes
- Yield: 12 servings
- Diet: Vegetarian
Description
Quick and nutritious no-bake energy bites made with oats, peanut butter, and honey, perfect for lunchboxes and snacking.
Ingredients
- 1 cup old-fashioned oats
- 2/3 cup toasted shredded coconut
- 1/2 cup creamy peanut butter
- 1/2 cup ground flaxseed
- 1/3 cup honey (or maple syrup for vegan option)
- 1/2 cup semisweet chocolate chips
- 1 tablespoon chia seeds (optional)
- 1 teaspoon vanilla extract
Instructions
- Toast the coconut until lightly golden and let it cool.
- Combine all ingredients in a mixing bowl and stir until evenly mixed.
- Chill the mixture in the refrigerator for 1-2 hours.
- Roll the mixture into one-inch balls.
- Store in an airtight container in the fridge for up to one week or freeze for up to three months.
Notes
Feel free to substitute ingredients based on dietary needs, like using maple syrup for a vegan version or sunflower seed butter for nut-free bites.
- Prep Time: 20 minutes
- Cook Time: 0 minutes
- Category: Snack
- Method: No-Cook
- Cuisine: American